Showing posts with label primitive oxford needle punch. Show all posts

Sunday, January 25, 2015

Hook~Stitch~Punch


I've been using up many of the scraps from the overflowing basket of worms....Love to make really scrappy rugs.  Danny told me I should have gave the boy overalls!  Guess I should have :)


I've also been working on applique patterns by Buttermilk Basin so relaxing and fun.


The oxford punch needle has been getting used, too.  Just a little bit of everything :)

It's been a busy week but never too busy to do a little hooking, stitching, and punching!

Happy Trails....Ginger

Wednesday, November 12, 2014

It's Chilly Out There!

 
Boy it has been cold and with the Oklahoma winds it chills ya right to the bone!  Hot chocolate sure tastes good on a cold and windy day.
 
It's a good time to bind on some rugs.  The snowman was oxford punched using a #14 mini punch with some of my hand dyed wool yarn.  Doesn't he look happy!

 
The penny rug was made using up lots of scraps and was hooked.    I love all the different ways rugs can be made I can't say that I am ever bored :)
 
Stay warm out there it sure is chilly!
 
Happy Trails....Ginger

Saturday, April 5, 2014

Yarn Scraps and Oxford Punching


You can use up lots of yarn scraps easy with an oxford punch needle and have some things to use around your home.  On this first one I drew a 15" circle and just punched around and around.  It will make a nice scrappy chairpad.


Some 8" square blocks done in straight lines 


Another 8" square done around and around


One more 8" square with a punched brown X then filled in with lots of scraps of yarn

All of these smaller pieces will work great as a hot pad since they are 100% wool yarn or just fun little pieces to sit about the house.

Thanks so much for all the prayers for our little Betty Rae I do appreciate all your thoughts and prayers for her.  

Happy Trails.....Ginger

Friday, August 2, 2013

Binding Can BE.......

Relaxing once you figure it out.  Now let me be the first to say I have tried all kinds of binding techniques and I have a couple of favorite ways.  One is with binding tape which I have found to be one of the most easiest once I learned how to do it.
I admit I once had a pile of over 40 hooked pieces needing bound all because I wasn't sure how to finish them without getting discouraged.
So I just kept on hooking and let them pile up.

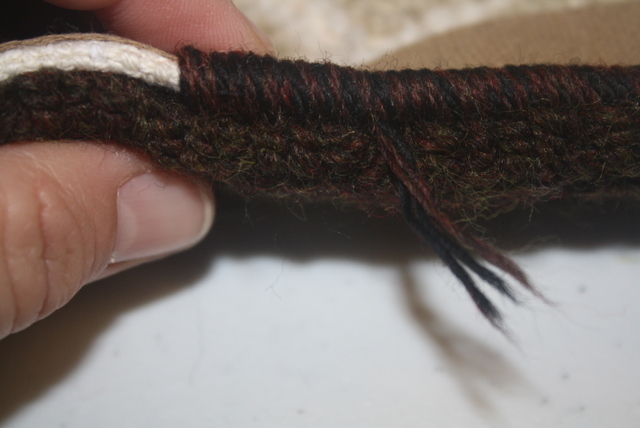
This method I am using on this oxford punched rug does not use binding tape.  I simply just trimmed the monks cloth folded it in and sewed a simple running stitch to hold it in place and rounded the corners a bit with needle and thread.


Here is the backside of the rug.  See how it adds the look of almost another row to the rug.
I have another rug I need to bind and I will try to take step by step photo's of how to do this.  Maybe it will give you another option to binding if you have never tried this.
 
I am binding this with the same wool yarn I hand~dyed for the punching.  It is a 4 ply wool yarn and it binds it very quickly :)
 
Enjoy your weekend and take a few minutes to slow down in this busy world we live in and just enjoy the simpler things of life!  You will be glad you did :)
 
Happy Trails......Ginger

Thursday, January 10, 2013

Putting a Pattern on for Rug Hooking and Punching

 
We have little workshops out at the house occasionally and with lots of new beginners I thought I would do a very simple tutorial on how to draw a straight of grain on to monks cloth you can also do this on linen or rug warp.
If you are going to do rug hooking then it won't matter the size of your frame or hoop but in oxford punch if using a frame with a gripper strip it is better to draw the pattern to fit inside the frame.
 
Here is what you will need to get started.  For the example I am drawing an 8 inch square.  You will need a sharp pencil, a ruler, serge or zig zag some monks cloth or linen (to prevent it from  raveling) and I use a Sharpie Rub a Dub marker.


I like to give myself plenty of room around the outside edge for binding so I leave a good 2 inches all around.
 
 
Take a good sharp pencil and place it at the top where one of your sides will be and slowly begin dragging your pencil down it will fall in the holes.


I pull the top just a bit to keep it good and taut as I'm dragging the pencil.
(sorry it's hard to get a pic and draw with one hand and hold it tight with the other)


Once you get it all drawn on you will have a pencil outline. 


Next I grab my Rub a Dub Sharpie.


I pull the marker down right over where the pencil had been go slow...believe me it is easier after you do the pencil than just beginning with the marker.  (My son came by so had him take a pic for me)


There you go a simple square ready for a design.  I'll show you another simple way to add a pattern in another post.
 
I know a lot of you are very experienced hookers and punchers but for those beginning I hope this helps!


Oh and don't forget to sign up for the pillow giveaway in the previous post I'll announce a winner this Friday.  I had made two of them and guess who snatched up one to take home....I just can't resist those little hugs and smooches!
 
Happy Trails....Ginger


Wednesday, November 7, 2012

Prairie Sunshine


Today we are enjoying a sunny day filled with light breezes sweeping across the Oklahoma prairie's.  The wind is suppose to be increasing and the temps will be dropping and a touch of winter is on the way.  I know a lot of the eastern states are having another round of bad weather and I hope all of you are safe and warm.
 
Well I've been punching and hooking up more little rugs and these little snowmen are some of my newest little pieces.  I guess I do better having a little pile hooked or punched up then bind them all in a day or two or that is at least what I hope to do!

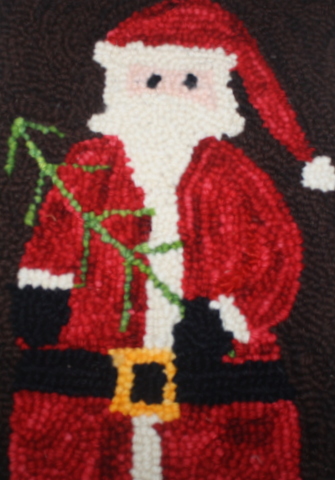
Old Saint Nick is all punched and needs binding, too.


This little red house and flowers needs steamed then bound. 
 
 
Last night I started this and hope to have it finished by tonight so I can steam and bind it with the others.
 
 
Since it is so nice today thought I would hang out the sheets and they are lazily flapping in the breeze!
 
 
This little ladybug decided to take a rest :)


Hope your enjoying your Wednesday I know I am!
 
Happy Trails.....Ginger

Saturday, November 3, 2012

A Woolie Week


Just wanted to first say my heart, thoughts, and prayers are with all those affected by Sandy.  Such a sad and hard thing to go through. 

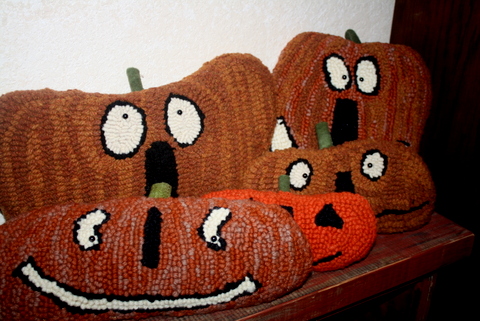
I've been trying to stay off the computer and see what I can accomplish.  I made this goofy bunch of pumpkins some were Frank's patterns and a few I drew up.  They will be put back for next fall.  I can work on fall items all year long and never grow tired of them

 
Then I punched up some needle cases and lined them with wool and made wool pages.


Then some heart ones with wool pages, too and added some  wonderful ribbon I found at a scrapbook store for the ties.

 
Then the dye and the wool yarn was calling to me so.....


I dyed some and some more!

 
I haven't tried much dyeing in the past so a lot of experiments going on.


Couldn't wait to try a little of that freshly dyed yarn.....
 
Of course I spent some time with the grandkiddo's....Miss Eva Mae is setting up and chattering up a storm.  She is the sweetest little girl always smiling. 

 
Sloan comes over after school each day and waits on his Dad or Mom to pick him up.  They keep me hopping but I wouldn't trade it for anything. 
 
Hope you found some time this week to share some time with the ones you love! 
 
Happy Trails.......Ginger

Wednesday, August 1, 2012

Kool~Aid Anyone?


I grew up drinking my share of kool~aid mostly grape and cherry....my kids had kool~aid, too. The grandkiddo's will I'm sure have their fair share, too. It comes in all kinds of flavors today.

Well I have been doing a LOT of punching lately and decided it was time to try dyeing wool yarn. So out with the crockpot and the kool~aid!


Wool waiting in a hot crock~pot.


Add a little wild berry and some citrac acid crystals to hold the color.


Let it dry on a HOT summer day in the shade...doesn't take long!


Wind into pretty yarn cakes....who doesn't like cake?????


Punch into a bright little house with flowers :)
Kool~Aid it's more than just a refreshing drink!


My niece Megan spent the day and I asked if she would like to learn to oxford punch and it took all of maybe 5 minutes and she had the punching down like a pro. She is now the proud owner of her very own handmade Spongebob Square Pants pillow made by her own hands!

Happy Trails....Ginger

Sunday, July 8, 2012

Hook * Punch* Paint


I've been keeping the hook, oxford punch, and the paintbrush busy! Lots of little things that need to be finished with the binding.


Had the strips for this pumpkin pre~cut and finally getting it started. Hope to finish hooking it this week but we shall see.....the kiddo's will be here this week :) This one is called "Bittersweet" and you can find it at Spruce Ridge Studios.


A few fall and Christmas painted canvas....with all this heat it's nice to be thinking of fall days!

It's been a busy weekend with moving a field of hay. Danny showed me how to load two bales on the tractor and my job was to get them in a row to load. He would load them up on the trailer and haul them and then come back for more. Happy to say they are all up near the barn.

Hope each one of you enjoyed your weekend and stayed out of the heat!

Happy Trails....Ginger

Wednesday, June 27, 2012

October 2012 Workshop! We are doing it again


Yes another workshop with Frank Bielec! It is scheduled for October 12th,13th,and 14th, 2012. Three days of hooking or punching your choice. Frank has almost finished the model for this next class and as soon as he is finished I'll be sure and share a photo!
If your interested on joining us just click on the cows on the right and send me an email and I'll let you know all the details.....

Happy Trails....Ginger

Sunday, April 29, 2012

Catching a Few Winks!


Thanks to all for the wonderful comments on our new little addition to the family. Her Mommy and Daddy are getting into a routine of sorts and are finally getting a few winks of sleep. Oh those first few days and weeks take some getting use too!

I have been over to visit and give them a little break here and there and of course I just love holding and snuggling our little cutie patootie! Sloan hasn't seen her yet but come Tuesday he will finally get to meet his little cousin....

In between all of the excitement I finished up the Antique inspired Rug. I oxford punched this one and really like how it turned out. It's simple without a lot of detail and now to find a place for it.

Well this old granny "MoMo" is a bit worn out, too. Think I'll go find a soft spot to catch a few winks myself.

I haven't forgot about doing a giveaway just need to do a little finish work!

Happy Trails.....Ginger

Wednesday, April 18, 2012

Antique Inspired Rug

I started my 2nd antique inspired rug....You can find the challenge pattern over at Kelley's Blog With Hook & Needle if you would like to participate. I decided to do this one with the oxford punch needle. The trees and birds look like "blobs" until you fill the background in around them....so if you try oxford punch don't worry about things when you are punching just stay within the lines and once the background is filled in it will turn the blobs into just what you wanted!

Happy Trails....Ginger

Friday, March 23, 2012

How I Bind A Hooked Rug


Well I've been known to have a pile of hooked rugs and mats to bind. I've tried binding them every which way and this is my favorite. With this method I whittled down a pile of 40 yes 40 rugs and mats last year! So gather up your wool yarn, a big eye needle,a few pins, and a sharp pair of scissors and let's get started.

First thing I did was trim up around my mat leaving about 1 inch of backing all around. I cut the corners at an angle to reduce the bulk.


You want to turn your piece over and lay it on a table...you want a flat surface to work on. Fold your backing over as shown in the picture above and pin your twill tape to the mat or rug. I only use about 3 or 4 pins and move them as I get each area bound. You DON'T want to start near a corner...but somewhere in the middle. I usually start in the middle on the bottom.


Since this is a small mat I went ahead and pinned just past the corner as you will see in a few photo's down. Now if you have ever bound a quilt this part will come easy....take that cut off corner and fold in as seen in the above photo. (As you can see I have farmgirl hands and could sure use a manicure)


Next you will fold in the bottom edge at an angle we are making a mitered corner.


Next fold in the side to the left...it doesn't have to be perfect but try to get them pretty close.


Now take your twill tape and lay it right on top of the backing that is mitered.


Fold the twill tape back on itself.


Now you will slightly turn it at an angle and start going up the side of the mat with the twill tape....see photo.


You will want to pin the corner right in the center of the turn.


Pin the twill tape in one more place just after the corner to hold it in place. It takes a bit of practice so don't worry you will get it!


It's time to grab that big~eye needle and the yarn and start binding.


To hide my yarn tail I run it through the backing and hide it on the inside. My needle comes out right beside where I hooked or oxford punched the last row.


I then put my needle throught the twill tape and then down through the backing coming up right at the edge of the last hooked row. It hides all the backing.


Continue whipping the yarn through the binding and backing with the yarn touching each other but not overlapping.


I'm running out of yarn...no fear just hide that tail right inside by putting the needle through the whipped area and pulling the yarn inside.


Unthread the needle and just cut that little yarn tail off close to where you whipped.


Load your needle again with yarn and hide that new beginning tail just like when we started with your needle coming up right beside the last whipped stitch. Your ready to go again :)


Oops there is a corner ahead (this use to be my worst area) but with this method it is pretty easy just take your time!


I whip right up to that folded corner then with the next stitch I catch into the folded area. Now I might put 3 stitches in that same hole at the top of the twill tape as I make my way around. Don't overdo it on the stitches...go slow and if you need to after the 3 stitches move them over by taking your needle and raking across them to fill the area. If you need another stitch to cover that corner put one in.
You want your stitches laying side by side not piled on top of each other.
With a little practice you will get it. I added a picture above and below for the corner.


Now do you feel like singing? You made it around the corner...hooray! Now let's continue up this side. Take those pins out from where you just bound your mat and continue putting them in the twill tape ahead.


We have made it around all 4 corners and are seeing the end in sight. Take the twill tape and cut it off leaving about an inch to fold back underneath itself and lay it on top of the beginning twill tape...pin it down to hold it.


Continue whipping your rug through all the thickness until you reach the very first whipped stitch. Run your needle and yarn through the whipped stitches and cut off the yarn.
Congratulations you have your rug whipped and we have just a little more finish work to go.


If your backing is still sticking out and not under your twill tape....simple grab a pair of scissors and fold back the twill tape and carefully cut away a portion of the monk's cloth or linen.


Now grab a sewing needle and some thread. Your ready to put the finishing touches on your mat or rug. Begin by sewing the twill tape together where they are joined.


Continue sewing through the twill tape at the top edge and into the hooked mat or rug.


I sew the corners up and then back down and contine sewing the twill tape down until I'm all the way back around.


Sometimes I add a fabric tag and there are times I just grab my sharpie and sign it right on the twill tape.


Now it's finished! Hope you enjoyed this little tutorial....It's the easiest way I have found to bind and I know there are a LOT of great methods for binding so give a few of them a try and see what works best for you.

Happy Trails...Ginger