

Here is another way I bind rugs. I don't always serge around the edges but for this one I did. You will want to leave about 1 1/2 inches all around the hooked piece to be folded in for binding.

Fold in up to the hooked row

Then fold over one more time.

Take a needle and thread and baste in place ..... it makes it a lot easier in the long run to do this step.

Now to make it simpler for your corners baste right up to them and leave them for last.

Fold in at the corner just as in the picture.

Then fold in one side

Then fold in the other side

With your needle and thread whip up the center

Lace it up with the needle and thread now repeat on each corner.
Now that all four corners are basted it is time to press.

Press it all around until it lies flat.

Now time to whip that rug. I am using 4 ply wool yarn that I have hand dyed and a big eye tapestry needle.

You want to come up with the needle right next to the last hooked row. You will hide your tail of your yarn as you whip the rug.

Now go down next to the last loop of the hooked row.

Come around with the yarn and right back down next to the last hooked row again. Repeat over and over laying the yarn right next to each other. DO NOT pull tight. You just want it to lay nice and even.

Nice and even and not too tight :)

Now just keep whipping right down the row keeping your needle right next to the last hooked row.

This is how the back should look it is also right next to the last hooked row.

When your yarn gets short run the needle back into the whipped row and hide the tail.
Clip off any extra bit of yarn.

Start again with another piece of yarn hiding the tail in the whipping and continue on.

As you approach the corner go slow and take your time. You may need to add 2 or 3 stitches in the same hole as you yarn over. Just lay them side by side as you go around the corner.

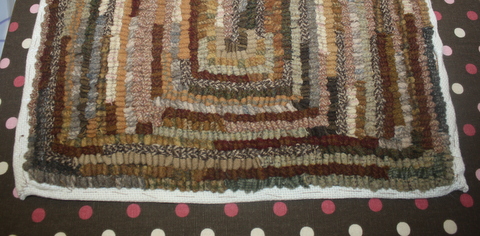
This is how it should look.

After you have rounded the corner just keep on whipping side by side.

This is the back of the rug showing the corner I just whipped.
Well that is it.....easy peasy isn't it!!!!!
I'm not going to finish this one just yet. I need a few rugs to show how to bind when we are at Silver Dollar City in a couple of weeks. So there will be plenty of time to finish this one up!
This lil' gal has been over visiting in the afternoons as Sloan is gone to visit his other Grandma before school begins for him next week. She finally has a chance to play a game all to herself :) How quickly they learn to make things work. Don't you just love lil' fingers and toes!!!!!!

Happy Trails......Ginger
13 comments:
Thanks for all the great pics as you moved through this process.
This is mostly how I bind my rugs also. Your hand dyed wool is PERFECT for this task, and looks beautiful in your pictures.
Rose
Wow it's looking so pretty..
Cute baby *.*
Thanks so much for taking the time and effort to put this tut together for us newbies..
when I whip a rug that is how I do it. I usually like to use wool or binding tape sewn on before I start working on the rug.
Cathy
Great tutorial, Ginger...binding looks perfect as well as easily done. Thanks for sharing.
Your Granddaughter is a little doll...what a sweetie!
Linda
Very nice Ginger. I do my rugs like this, so you don't do the rope thing? Also do you add that binding on the top like some people do or do you leave it? I want to start selling my rugs and I have wondered about this. Thank you,
Kim
Great tutorial on whipping a rug. Love the hit or miss rug. This is how I finish most of my rugs, but I must be slow, because it isn't quick for me.
Melinda
Kim, I don't put the rope in my binding but have seen it in many rugs and it does look nice. As far as binding tape I have another tutorial using that method that is very easy to do also.
If I don't use the binding tape I do make a tag for my rug and date and initial it and add it to the back of my rug once I am finished.
Good luck with all your rugs :)
Great tutorial! I loved binding my rugs...and I love binding my quilts. Something about the quietness of hand-sewing, methinks.
Thank you for the great tutorial. It gave me the courage to tackle whipping a rug. I really love the look but have been so intimidated by the process that I have only used binding tape. Next I need a tutorial on braided edges!
Thanks again!
~Sue
Hi Ginger - what an easy tutorial for binding a hooked rug.
I have a printed direction for it this way, but seeing you do it makes it look like you said...easy peasy! I think I can now tackle the 3 that are waiting for binding!
Oh what precious picture of sweet baby girl.
Blessings,
Karen
I have never understood the proper way to bind a hooked rug. With your pictures, the light bulb has gone on and I get it! Thanks!
Very clear, thank you. Can you post a picture of The whole rug AFTER you have bound it? I would find that helpful. Thanks!
Post a Comment