Well I've been known to have a pile of hooked rugs and mats to bind. I've tried binding them every which way and this is my favorite. With this method I whittled down a pile of 40 yes 40 rugs and mats last year! So gather up your wool yarn, a big eye needle,a few pins, and a sharp pair of scissors and let's get started.
First thing I did was trim up around my mat leaving about 1 inch of backing all around. I cut the corners at an angle to reduce the bulk.

You want to turn your piece over and lay it on a table...you want a flat surface to work on. Fold your backing over as shown in the picture above and pin your twill tape to the mat or rug. I only use about 3 or 4 pins and move them as I get each area bound. You DON'T want to start near a corner...but somewhere in the middle. I usually start in the middle on the bottom.

Since this is a small mat I went ahead and pinned just past the corner as you will see in a few photo's down. Now if you have ever bound a quilt this part will come easy....take that cut off corner and fold in as seen in the above photo. (As you can see I have farmgirl hands and could sure use a manicure)

Next you will fold in the bottom edge at an angle we are making a mitered corner.

Next fold in the side to the left...it doesn't have to be perfect but try to get them pretty close.

Now take your twill tape and lay it right on top of the backing that is mitered.

Fold the twill tape back on itself.

Now you will slightly turn it at an angle and start going up the side of the mat with the twill tape....see photo.

You will want to pin the corner right in the center of the turn.

Pin the twill tape in one more place just after the corner to hold it in place. It takes a bit of practice so don't worry you will get it!

It's time to grab that big~eye needle and the yarn and start binding.

To hide my yarn tail I run it through the backing and hide it on the inside. My needle comes out right beside where I hooked or oxford punched the last row.

I then put my needle throught the twill tape and then down through the backing coming up right at the edge of the last hooked row. It hides all the backing.

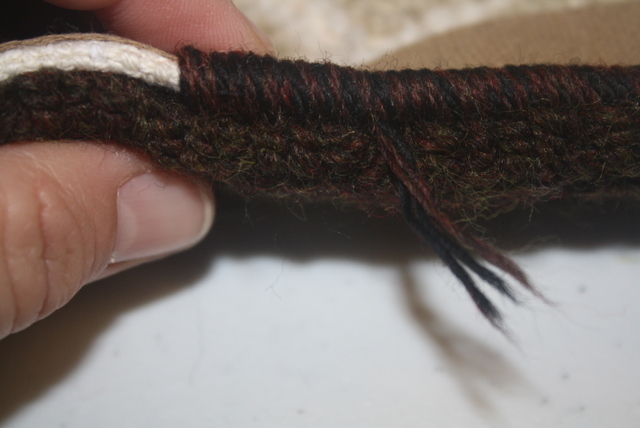
Continue whipping the yarn through the binding and backing with the yarn touching each other but not overlapping.

I'm running out of yarn...no fear just hide that tail right inside by putting the needle through the whipped area and pulling the yarn inside.

Unthread the needle and just cut that little yarn tail off close to where you whipped.

Load your needle again with yarn and hide that new beginning tail just like when we started with your needle coming up right beside the last whipped stitch. Your ready to go again :)

Oops there is a corner ahead (this use to be my worst area) but with this method it is pretty easy just take your time!

I whip right up to that folded corner then with the next stitch I catch into the folded area. Now I might put 3 stitches in that same hole at the top of the twill tape as I make my way around. Don't overdo it on the stitches...go slow and if you need to after the 3 stitches move them over by taking your needle and raking across them to fill the area. If you need another stitch to cover that corner put one in.
You want your stitches laying side by side not piled on top of each other.
With a little practice you will get it. I added a picture above and below for the corner.


Now do you feel like singing? You made it around the corner...hooray! Now let's continue up this side. Take those pins out from where you just bound your mat and continue putting them in the twill tape ahead.

We have made it around all 4 corners and are seeing the end in sight. Take the twill tape and cut it off leaving about an inch to fold back underneath itself and lay it on top of the beginning twill tape...pin it down to hold it.

Continue whipping your rug through all the thickness until you reach the very first whipped stitch. Run your needle and yarn through the whipped stitches and cut off the yarn.
Congratulations you have your rug whipped and we have just a little more finish work to go.

If your backing is still sticking out and not under your twill tape....simple grab a pair of scissors and fold back the twill tape and carefully cut away a portion of the monk's cloth or linen.


Now grab a sewing needle and some thread. Your ready to put the finishing touches on your mat or rug. Begin by sewing the twill tape together where they are joined.

Continue sewing through the twill tape at the top edge and into the hooked mat or rug.

I sew the corners up and then back down and contine sewing the twill tape down until I'm all the way back around.

Sometimes I add a fabric tag and there are times I just grab my sharpie and sign it right on the twill tape.

Now it's finished! Hope you enjoyed this little tutorial....It's the easiest way I have found to bind and I know there are a LOT of great methods for binding so give a few of them a try and see what works best for you.
Happy Trails...Ginger