I love to do needle punch! I just finished up this quick piece that measures about 9 1/2 inches across. I thought I would share with you a different way to finish the edge.
Here is what I did.....Trim backing of weavers cloth around project and baste to back of punched piece. Cut out a piece of wool the same size as project and lay on the back.
Blanket stitch with wool thread or embroidery floss....I used wool thread on mine.
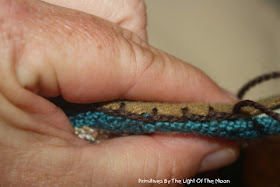
Here is the blanket stitching. I made sure to go all the way through the wool backing and just a little into the basted back weavers cloth right next to the last punched row.
A little closer look :)
This is what the back of the wool looks like as I blanket stitch all around.
Now for the crochet edge. I used a D size crochet hook and within every other blanket stitched area I worked one single crochet, one double crochet, and one single crochet creating a little scallop then in the next blanket stitch space I slip stitched then repeated in the next blanket stitch 1 sc, 1 dc, 1 sc, then next blanket stitch space slip stitch, continue to repeat around.
Next I took a needle and thread and securely stitched around the wool to the punched piece just to make sure everything was right up to the edge of the punched piece.
Here is the back
and once again the front!
Just another simple way to finish a punch needle project!
Happy Trails.....Ginger


What a wonderful, fun finish. Thanks for sharing.
ReplyDeleteHugs :)
Lauren
Really cute finish! I will give this a try. Love your punchneedle piece! Thanks for sharing.
ReplyDeleteEnjoy your day,
Leanne
I love how you did the edge, that really looks beautiful on this piece.
ReplyDeleteDebbie
Really adds a beautiful touch. Thanks for sharing. :)
ReplyDeleteWow it's looking so beautiful..
ReplyDeleteThank you for sharing
Hugs x
Thanks for the tut. I love the look of this. I don't punch but I do hook and I might try it on a piece.
ReplyDeleteGreat look and like the idea of finishing a piece like that. One could even use that technique on a small hooked mat or chair pad too. Thanks for sharing.
ReplyDeleteSaundra
So perfect! Thank you for sharing. Now I have to get punching so I can try it! :-)
ReplyDeleteWhat a great edging to finish these wee pieces. Thank you for sharing through this tutorial posting.
ReplyDeleteI can't wait to try it out!
Glad I stopped by for the visit!
Cynthia
Thank you for this very clever
ReplyDeletefinish. I don't crochet, but can
certainly do this with your instructions.
This turned out great! I'm glad I saw this. I'm always open to new ideas for finishing and I like the crocheted edge.
ReplyDeleteI wanted to be sure to mention I heard praise of your generous heart, hearth, and home just about a week ago.
ReplyDeleteEventually, I'll get around to a blog post, but Cora M. Was singing your praises to me at the Kirby Hook In! In Houston, Tx. She and a friend came to the workshop with Frank B. Cora enjoyed every moment of her visit, and all of the ways you were a generous hostess that are so natural to you. I miss you lots, and hope our paths cross again in this life. If not, promise you'll look me up in Heaven! <3 If I make it!
So very nice of you to show people how to do another type of finish for their needle punched pieces. Beautiful Work Ginger!!!!
ReplyDeleteGinger, I really like this pattern!! I went to your Etsy Shop but I didn't see it there. Do you not sell this pattern??
ReplyDeleteThank You!!
Wonderful finish! thanks for sharing! ~ronda
ReplyDeleteLovely punched work and beautiful finish - thanks for sharing so thoroughly!
ReplyDeleteI don't know how to crotchet though��
ReplyDeleteWish I knew how to crotchet though!
ReplyDelete